How to Make a Fluted Wood Planter (for Under $2)
This post may contain affiliate links.
I’m obsessing over this fluted wood trend we’re seeing in home decor right now. Closely related to the wood slat trend, fluted wood is a texture that features softly rounded sticks of wood that butt right up against each other like in this gorgeous console:

But to be honest, I’m not sure I’ll still love the ribbed furniture look 5 years from now.
When experimenting with a trend I find it best to add it in small doses. I love coming up with clever upcycling ideas to decorate with, so I created this incredibly easy DIY to add a little ribbed wood to my life.
In this post, I’m going to teach you how to make a fluted wood planter using an upcycled gelato cup and some basic wood dowels.
Like it? Pin it!

This post contains some affiliate links for your convenience. Click here to read my full disclosure policy. Thanks for supporting Craft Your Happy Place!
How to Make a Fluted Wood Planter
Easily make this on-trend planter by gluing craft dowels to an empty plastic container and spray painting the whole thing. This is a great way to upcycle those screw-top plastic containers that a lot of foods are sold in. I used a gelato cup.
MATERIALS NEEDED
- Clean, round plastic container (I used a Talenti Gelato tub)
- 6″ wooden craft dowels
- Glue gun (this is my favorite budget model)
- Spray paint
- Jute twine
Step 1: Find a round plastic container

You’ll need a round plastic container like the kind gelato comes in (other foods use these containers as well). Other than being round, the container needs to have straight sides. Otherwise, this won’t work.
I personally like that I can upcycle my old containers, but you can also purchase new ones in bulk. They’re awesome for small storage, slime (do you make an abundance of slime with your kids, or is that just me?), and food-based gifts.
Step 2: Glue dowels to the container
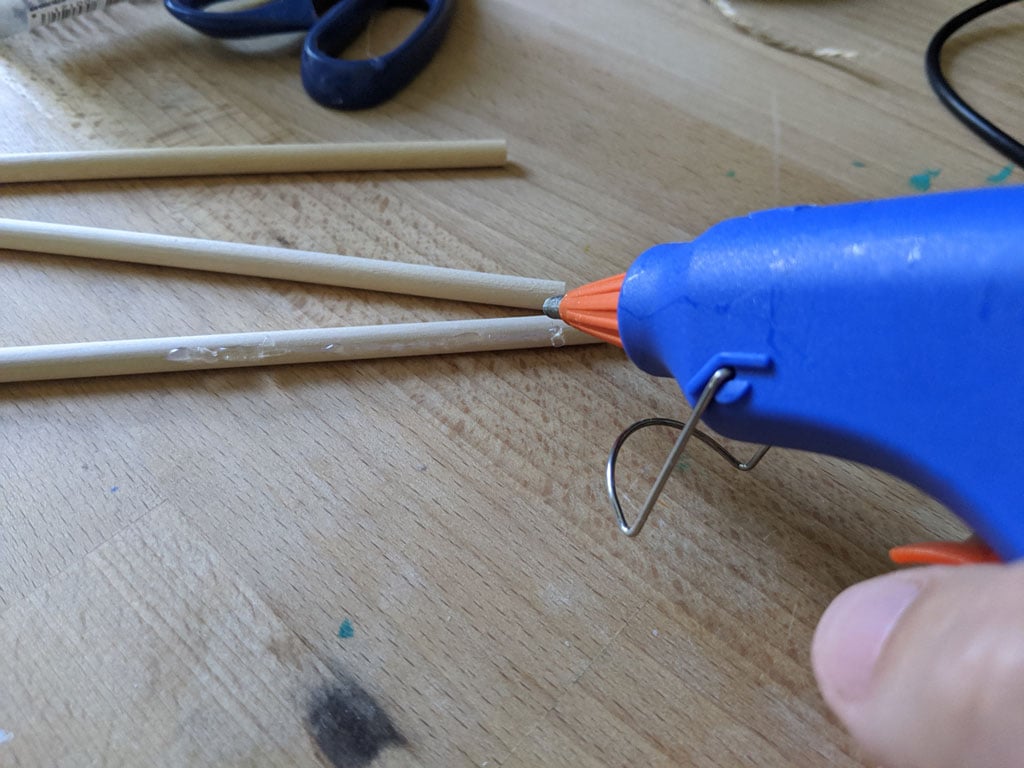
By either applying glue to the dowels or to the container itself, attach the dowels. Butt the flat top of the dowel to the underside of the screw top lip.
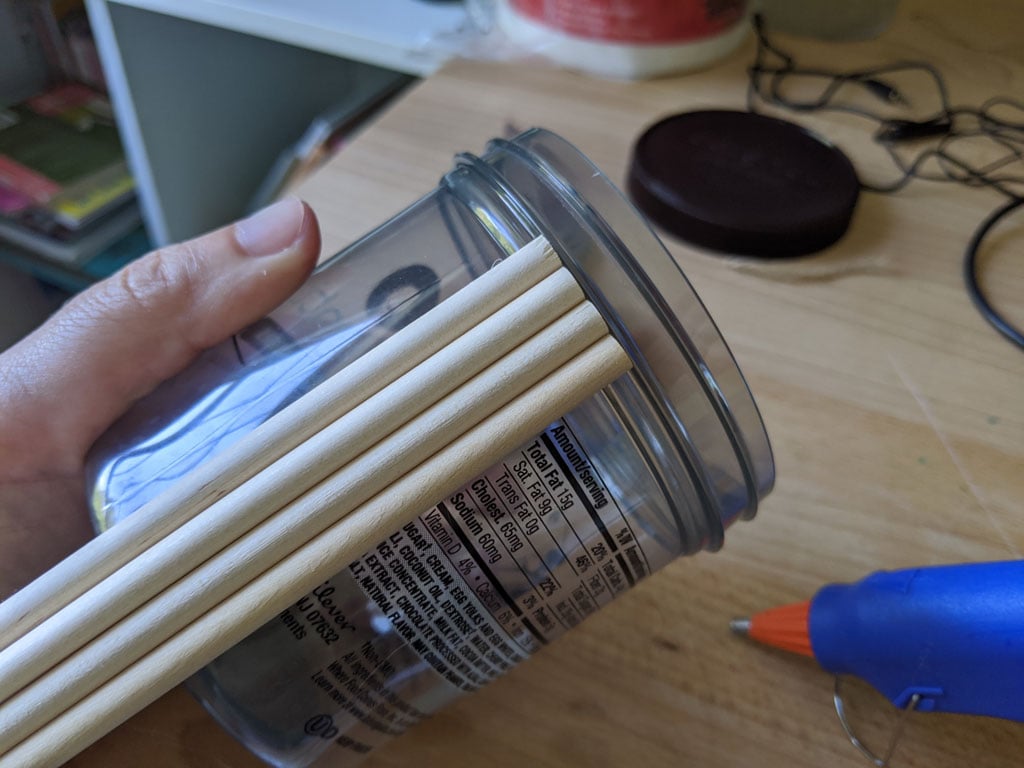
It’s crucial that you line the dowels up perfectly parallel to one another. Otherwise, you’ll incrementally begin spiraling outward like I did on my first attempt:
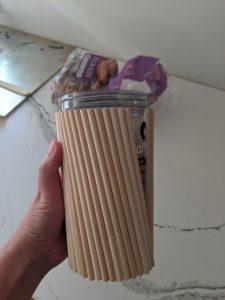
If this does happen, don’t freak out. It’s fixable!
Locate where the alignment started to go off — on mine, it was a glob of glue that pushed its way out from between two dowels and skewed them. Then pull off all the dowels from that point forward and reapply with correct alignment.
Step 3: Spray paint your planter

Once all of your dowels are attached to the container, spray paint the entire planter inside and out. I did two thin layers and the finish is flawless. I really like this spray paint for covering projects that contain multiple materials. In this case, plastic and wood.
I hope it goes without saying that you should choose whatever color you like. I’m a sucker for black but this planter would also be amazing in bright pop-y colors or soothing pastels. Experiment!
Step 4: Wrap jute twine around the top

To cover the grooves where the cap screws on, wrap the jute twine around the top. Start off by squirting a dot of hot glue at the bottom ridge of the area you’re covering, and secure the beginning of your twine to the container.
Wrap the twine around the container tightly, using as little glue as possible to minimize potential mess.
Tip: choose what will be the “back” of your planter and always glue there.
The tension of the twine will hold things together for the most part, so tons of gluing won’t be necessary.
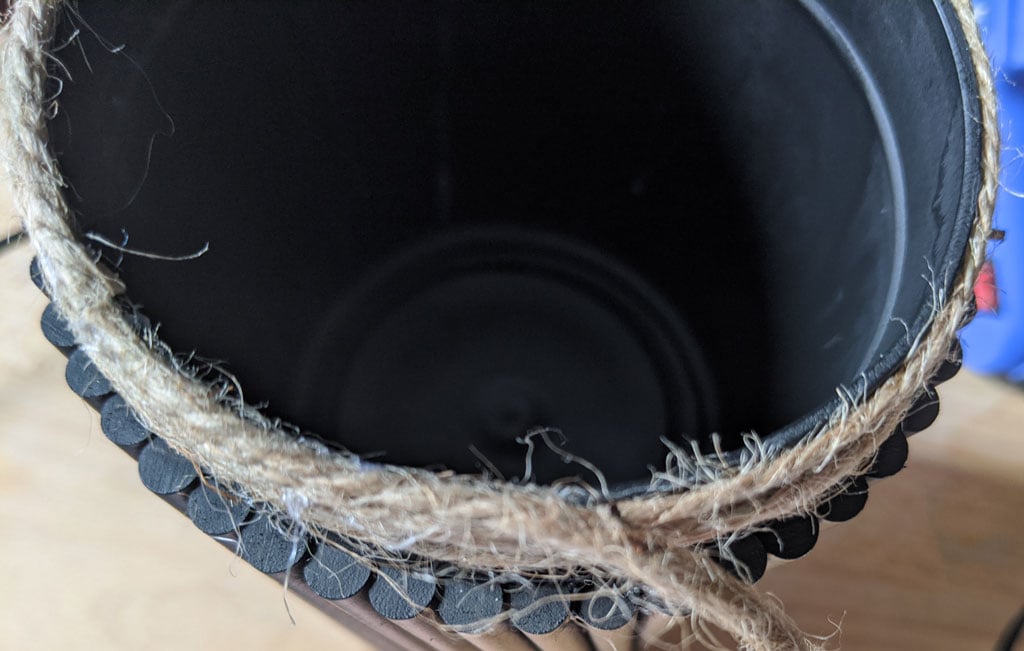
The exception to this gluing guideline is the very top edge of the container. You’ll want to conceal the entire edge and the only way to secure the twine well is to apply glue almost the entire way around.
Just go slow, use as little as possible, and only do a tiny bit at a time. I promise this isn’t as tedious as it sounds since this is a pretty small container.

Continue wrapping the twine for several layers to build out the thickness of that organic jute rim. Bring the depth out to the edge of the dowel so that everything is integrated onto a level plane.
My rim only took three layers but it could vary a bit depending upon how chunky your twine is.
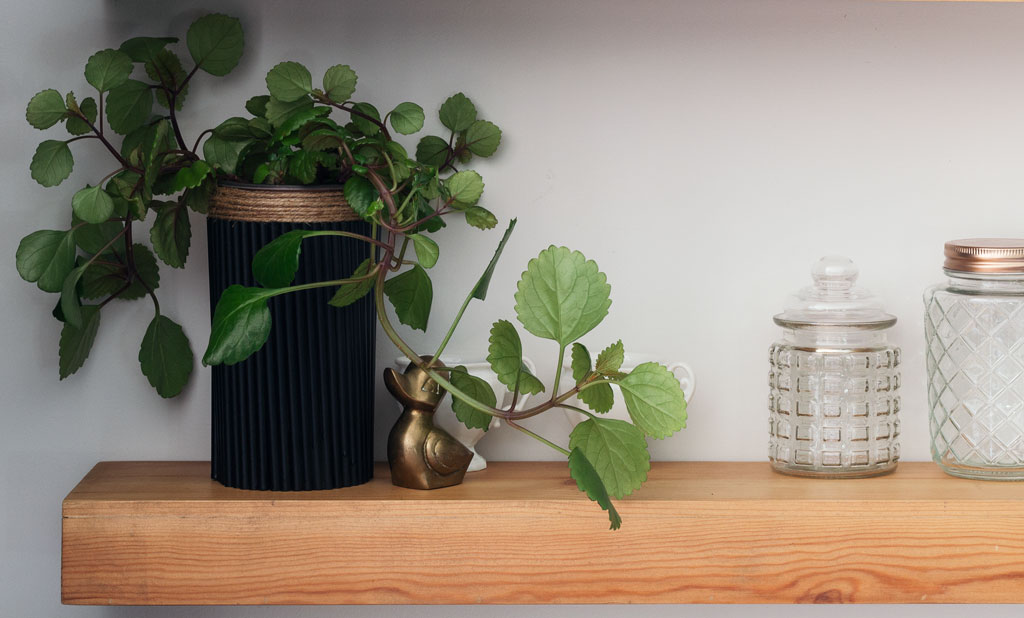
And you’re done!
How beautiful is this? My husband was shocked when I explained how I made it.
To best use this ribbed wood planter pop a plant, nursery pot and all, into the container. I adore bringing home plant babies but do not adore the plastic nursery pots.
I’m always coming up with new ways to camouflage those, like when I decorated my kitchen for the summer.
Next time you finish off a pint of yummy gelato, don’t throw away that container! Try out this chic little DIY and let me know how it turns out for you.
