
If your little ones enjoy painting, they’ll love this DIY Rock Bug Garden! This craft is all about creativity and exploration, allowing toddlers to use their imagination while making their own colorful bug creations. While they can design their bugs however they like, it can also be helpful to show them images of real insects for inspiration—ladybugs, beetles, butterflies, or even some made-up critters!
The focus of this project is more on the process than the final product, making it a wonderful way to encourage artistic expression without worrying about perfection. Plus, it’s an excellent activity for a rainy day or any time you need an engaging indoor project to do together.
Here’s how you can create your own Rock Bug Garden at home!

Supplies
- Medium and Small Rocks
- Acrylic Paint
- Googly Eyes
- Strong glue or Hot Glue Gun

How to Make a Rocky Bug Garden
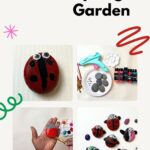
Step 1: Pick Stones
Pick out a variety of stones of different sizes for painting.
Step 2: Start Painting
Show your toddler pictures of different bugs and let them decide which ones they want to paint. We choose to paint a ladybug and a butterfly. My toddler also got creative by choosing to paint abstract colors on a rock. Let the paint dry before adding details. We used a small fan to speed up the process.


Step 3: Add the Details to the Stones
Now is a good time to add additional details to the stones. For the ladybug, we added an additional black color to create the stripes and dots, and the same with the butterfly so that the paint wouldn’t blend too much into each other.
Step 4: Finish the Faces of Bugs
Start gluing the googly eyes to each of the painted bugs to truly bring them to life. We used the hot glue gun so I helped my toddler add them on.


Step 5: Arrange your Bugs
Finish your look by arranging your bugs on a small cardboard or wooden plank. Arrange at random to create the look of a garden.

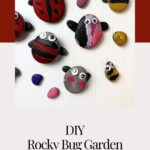
Now, Your Rocky Bug Garden is ready for display.