


I’m not usually drawn to coastal decor, but in the summer, I find myself appreciating its charm.
But since it’s not something I’d use year-round, I can’t justify making an investment in these pieces. When I think about hosting a summer party, I always imagine gorgeous tablescapes similar to those in the Pottery Barn catalog – they’re undeniably gorgeous.

Gorgeous, right? And at $12 a piece, they’re not terribly pricey—until you realize you need about 12 for a proper set. So… $144 for glorified placemats? Ouch. It’s a bit too pricey for my taste.
I refused to let my dream die, so I created an amazing, silly, affordable dupe.
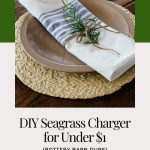
I’ll demonstrate how to craft braided seagrass plate chargers that mimic the Pottery Barn version, all for under $1 per placement.

How to Make a Seagrass Charger Plate
To make a DIY seagrass charger, you simply braid small bundles of raffia and glue them in a spiral shape to a piece of cardboard.
Materials and Tools
Step 1: Braid your raffia

Separate your raffia into bundles of 3 strands each, cut to about 30″ long. Tie or tape off the top end of 3 bundles, then braid each set using a standard braiding action (right side over center, left side over center, repeat) until you reach the end. Tie or tape off the tail end.
Repeat this process until you have 20 braided grass ropes. You can always make more if needed, but this is a good start.

Step 2: Cut a circle from a piece of cardboard

Grab a cardboard box and cut out a 12″ – 14″ circle. As you can see from this photo, it doesn’t have to be perfect! Determine the size you want based on the plates you’ll use them with by adding 3″ – 4″ inches to the plate’s diameter.
For a sturdier seagrass charger, use a $1 pizza pan from Dollar Tree for the base! This is a great option for an outdoor party where people might carry their food around as they mingle.
Step 3: Glue braided raffia to cardboard base

Starting in the center of your cardboard circle, hot glue the end of your first grass braid. Continuing gluing the braid in a tight spiral, taking care to keep the braids right next to each other so none of the cardboard backing shows through.

When you reach the end of a braid, simply cut the end right before the tape (or knot if you tied it), making sure you have a straight edge. Then, cut the end of your next braid and glue the beginning of this braid directly up against the end of the previous braid.
The transition will blend into your placemat since this is a lovely organic texture.
Step 4: Cut off the excess cardboard

Once your seagrass braid spiral reaches the edge of your charger base, securely glue the end of the final braid. Then, trim the excess cardboard off your placemat using a craft knife or pair of scissors.
Be sure to trim the edge slightly underneath the outer seagrass braid to avoid seeing the raw cardboard.
How did we do?

I don’t know about you, but I’m just as happy with our DIY seagrass charger as I am with the Pottery Barn version—and it was one-half the cost!