

You are going to love this quirky, modern sculpture. It is perfect to sit on the far edge of a mantle.
It is so cool — almost like a 3D line drawing!
And what’s even cooler is that it’s super easy to make yourself.
In this post, I’ll show you how to make a modern wire sculpture that looks like 3D line art. This DIY project is easy and extremely cheap to make.
I love how chic this freestanding sculpture is. Here’s how you can make it at home.
Like it? Pin it!

How to Make an Easy Wire Sculpture
To make an easy wire sculpture, you simply take a roll of 10 gauge armature wire and shape it along a printed continuous line drawing. From there, you do a final shaping to allow it to stand then spray with several light coats of paint.
Materials Needed
- Armature wire (use 10 gauge for a 9″ – 12″ sculpture)
- Needlenose pliers (optional but useful)
- Wire snips
- Spray paint
- Line drawing (download the template I made for below)
Step 1: Draw or print a template

To make this easy style of wire sculpture, you need to start with a continuous line drawing to use as a template. You can draw one yourself or Google the term “continuous line drawing” or “single line drawing” and choose one of the images that come up as a starting point.

Be sure to print or draw the template to the actual finished size you’re aiming for. Mine is about 9.5″ tall.
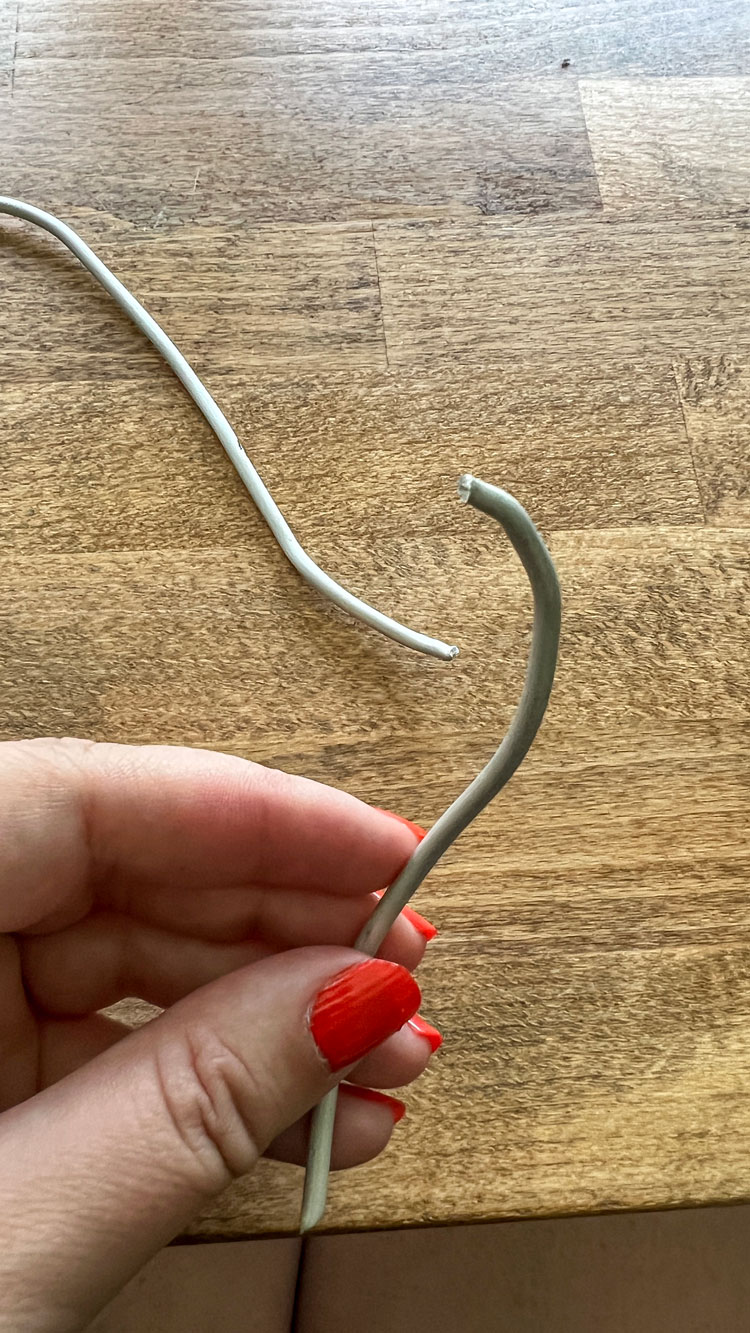
Step 2: Bend wire along the template

Next, take your armature wire and trace it along the lines of the template, bending and shaping as you go. Perfection isn’t necessary, just do the best you can.
This is abstract art, after all!

For any bends that are too sharp to easily make with your fingers, you can use a pair of long nose pliers to squeeze the wire into shape.
Try to take into consideration what parts of the figure would naturally be in the back if you were looking at it in real life.
Which leg would be in front and which would be in back?
How about the arms? Shoulders?
Once you’ve determined which parts belong in the back, be sure to guide the wire for that part behind the wire for the front parts any time the lines cross.

When you reach the end of the template, clip the armature wire with wire snips or tin snips (basically anything that cuts soft wire).
Step 3: Create a base

Now that the frame of your wire sculpture is complete, you need to shape it a bit to create a base and give it more dimension. Gently pull the back and front sections apart at the bottom until the piece can stand on its own.
If you want to see the final shaping demonstrated, check out this video:
Step 4: Spray paint

Now that your actual sculpture is complete, mist lightly with 2 to 3 coats of Spray paint in the color of your choosing. I opted for a black graphic, but this wire figure would also look amazing in a neon yellow for a pop of modern color or in deep russet tones for a neutral boho space.

How amazing does this look on the mantel?? I love the organic airy shape against the aged books and sleek geo wood vase.