How Do You Use Air Dry Clay? An Easy Beginner’s Guide
This post may contain affiliate links.
If you enjoy crafts, you’ll love working with air-dry clay. You can make so many exciting projects with it, and once you get started, you’ll want to make home decor items, gifts, and more. So, how do you use air-dry clay?
When using air-dry clay as a beginner, you should keep it soft and pliable. This involves only taking it out of the packaging when you’re ready to use it and wetting your hands or gently misting it if you find it too hard.
In this article, I’ll explain how to make air-dry clay easier to work with and what to do if it’s too soft. I’ll also describe some interesting things you can make from it.
How Do You Make Air Dry Clay Easier To Work With?
Working with air-dry clay can seem daunting if you’re a newcomer to crafting. You’ve probably already heard that it can dry quickly, making it difficult to shape into your desired object. So, how do you make it easier to work with?
You make air-dry clay easier to work with by storing it in an airtight container, using a non-stick work surface, gently softening it, using a rolling pin, and removing imperfections while it’s still soft. You should also use acrylic paint and white clay for painted projects.
I’ll discuss these tips in more detail below:
Store It in an Airtight Container
As its name implies, air-dry clay gradually starts to dry when you take it out of its packaging. If you have leftover clay and don’t store it in properly, it can become dry, making it difficult to work with.
One way to overcome this is only to buy as much as you need, but realistically? You’ll always have some left over.
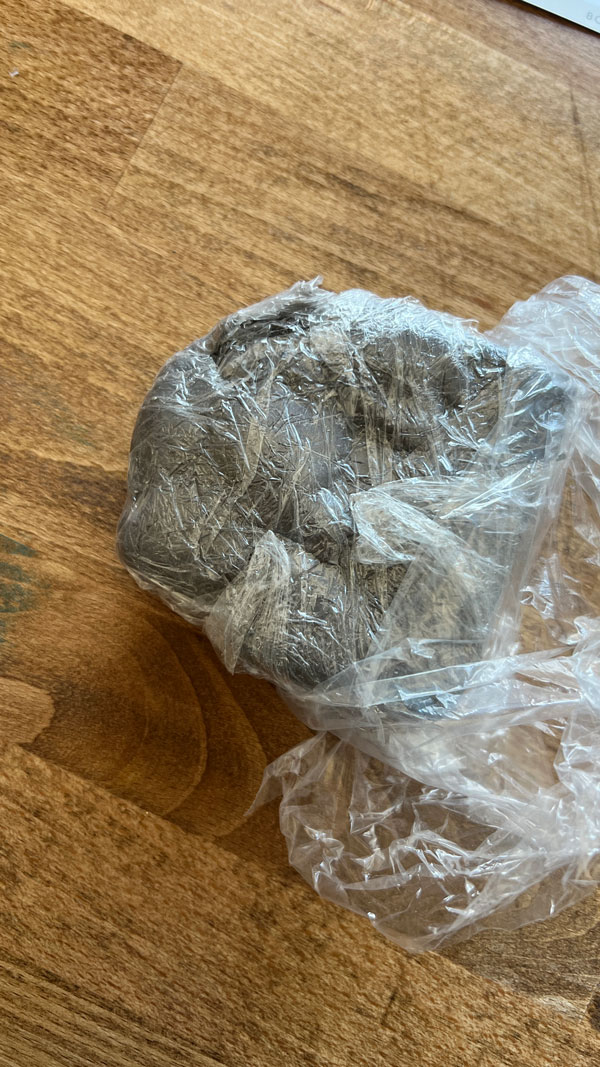
A better plan is to have a dedicated, airtight container for your clay. I use this airtight container from Amazon and take the added step of wrapping the leftover clay in plastic wrap before placing it into the container.
Use a Non-Stick Work Surface
If you’ve just started working with air-dry clay and find it tricky to handle, it could be because your work surface is too sticky. Wood is notorious for making air-dry clay sticky as it’s textured and porous.
To make your air-dry clay easier to work with, consider a non-stick work surface. You don’t need to invest in a brand-new craft table because there are many great ways to create a non-stick work surface:
- Marble cutting board. Marble cutting boards can be pricey, but it can be worth it if you plan on working with air-dry clay extensively. Marble is typically cool and can prevent the clay from sticking.
- Smooth-textured glass cutting board. Smooth glass makes an excellent work surface for air-dry clay, and it’s easy to clean after using paint. Since it’s highly durable, it won’t become damaged by cutting tools.
- Wax or parchment paper. Using wax or parchment paper on your work surface makes cleaning up after working with air-dry clay very easy.
- Printer paper. Although printer paper isn’t as effective as wax paper, it will work in a pinch.
- Non-stick mat. Investing in a non-stick work mat for your air-dry clay projects is a fantastic idea. These mats are usually made from silicone and come in various sizes. I have this set from Amazon they work great!
Gently Soften Your Air Dry Clay
When working with air-dry clay, you must strike the right balance between keeping the clay soft and not allowing it to harden too quickly.
What happens when air-dry clay hardens? Does it stay hard? Read my full guide to dealing with air dry clay hardening.
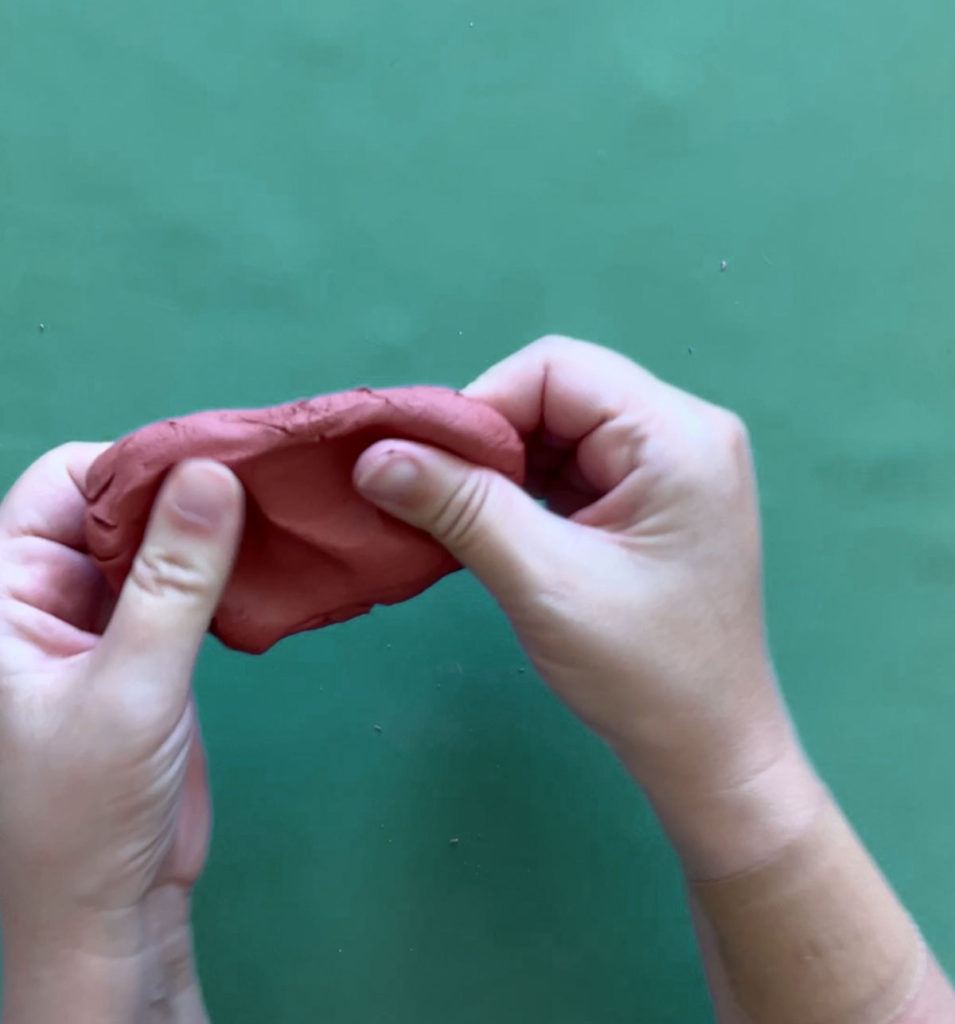
After removing your air-dry clay from its packaging, it can feel hard, and you may find it difficult to shape. Gently pressing and molding it with your fingers will make it softer, but the longer you work on your clay object, the drier and harder it will become.
You can overcome this problem by:
- Wetting your hands, shaking off the excess water, and working with slightly damp hands
- Using a spray bottle of water to mist the clay gently
- Applying hand lotion or skin oil before using the clay to lubricate it
If you’re working on a large object you can’t finish in one sitting, you can keep the clay soft by wrapping it in a gently-moistened and lint-free cloth. To prevent the cloth from drying, cover it in saran wrap.
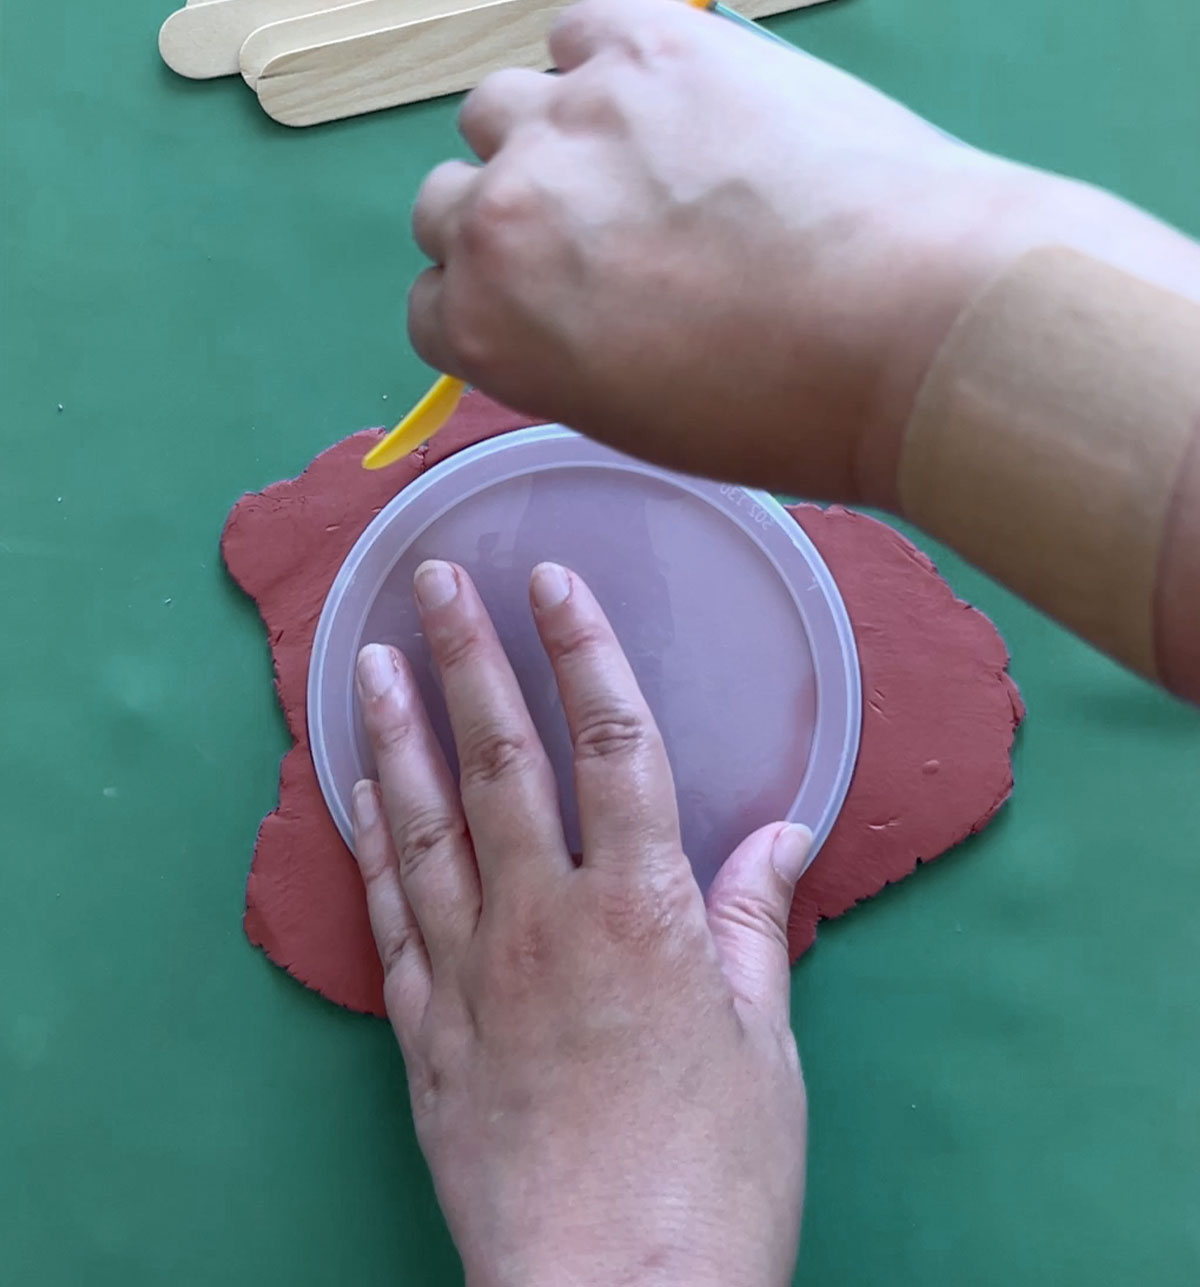
Use a Rolling Pin
A common rookie mistake is not using a rolling pin to make your air-dry clay flat and smooth. While it can feel tempting to dive in immediately and start working on your clay object, not taking a few minutes to make the thickness uniform can make the end result look lumpy and messy.
Ceramic rolling pins work very well with air-dry clay. Juvale Clear Clay Rolling Pins (available on Amazon) come in a two-pack and are easy to manipulate with your hands if you apply gentle pressure. Otherwise, a wooden rolling pin with a plastic barrier will do the job.
Use Acrylic Paint and White Clay for Painted Objects
After creating something from air-dry clay, it can feel tempting to paint it to make it unique. If you think you’ll want to paint your object, use white clay, as darker clay will require more than one paint layer.
Acrylic paint is the most suitable product for air dry clay because it applies smoothly and evenly and dries quickly. Once the paint has dried, apply a sealant, or it will gradually peel off.
An acrylic paint sealer will safeguard the underlying paint and give it a soft sheen. Mod Podge Acrylic Sealer Spray (available on Amazon.com) is a spray-on sealant, making application easy and fast. It dries quickly, and you can use it for other painting projects.
Did you know that you shouldn’t paint air-dry clay before it dries? Find out why in the full guide.
Remove Imperfections While It’s Still Soft
Air-dry clay is very forgiving, but only when it’s still soft. Before finishing your project, use clay tools or your fingers to rectify any imperfections, which will be permanent once the clay has dried.
If you’re struggling to smooth out certain areas or remove bumpy bits, wet your fingers a little to soften the clay, and fix the imperfections.
What Do You Do When Air Dry Clay Is Too Soft?
In the last section, I mentioned that it’s important to keep your air-dry clay soft and pliable so that it doesn’t develop cracks and it’s easier to work with. But what do you do if your air-dry clay is too soft?
If your air-dry clay is too soft, you can mix in a little PVA glue, place it in the freezer for five minutes, work in an air-conditioned area, or sprinkle some cornstarch on your work surface.
Using a little PVA glue with air-dry clay helps to give it a firmer texture. All you need is one squirt for about 1lb/0.45kg of air-dry clay, which you can work into it. However, if your clay is particularly soft, mix a squirt of PVA glue with half a tablespoon (0.25 fl oz) of water and work that into your clay.
Sometimes, air-dry clay becomes too soft to mold when the ambient temperature is too hot. In such cases, placing it in the freezer for five minutes can make it easier to work with and firmer. Turning the air conditioning on and waiting for half an hour can also help.
Finally, sprinkling a little cornstarch on your work surface can absorb any excess water in the clay and give it a firmer texture.
Reviving air-dry clay is another common concern for many beginners. Is that possible? I have the answer in my guide.
What Can You Make With Air-Dry Clay?
Now that I’ve described how to make air-dry clay easier to work with and what to do if it’s too soft, the fun part has arrived; what to make with it!
Here are some interesting things to make with it:
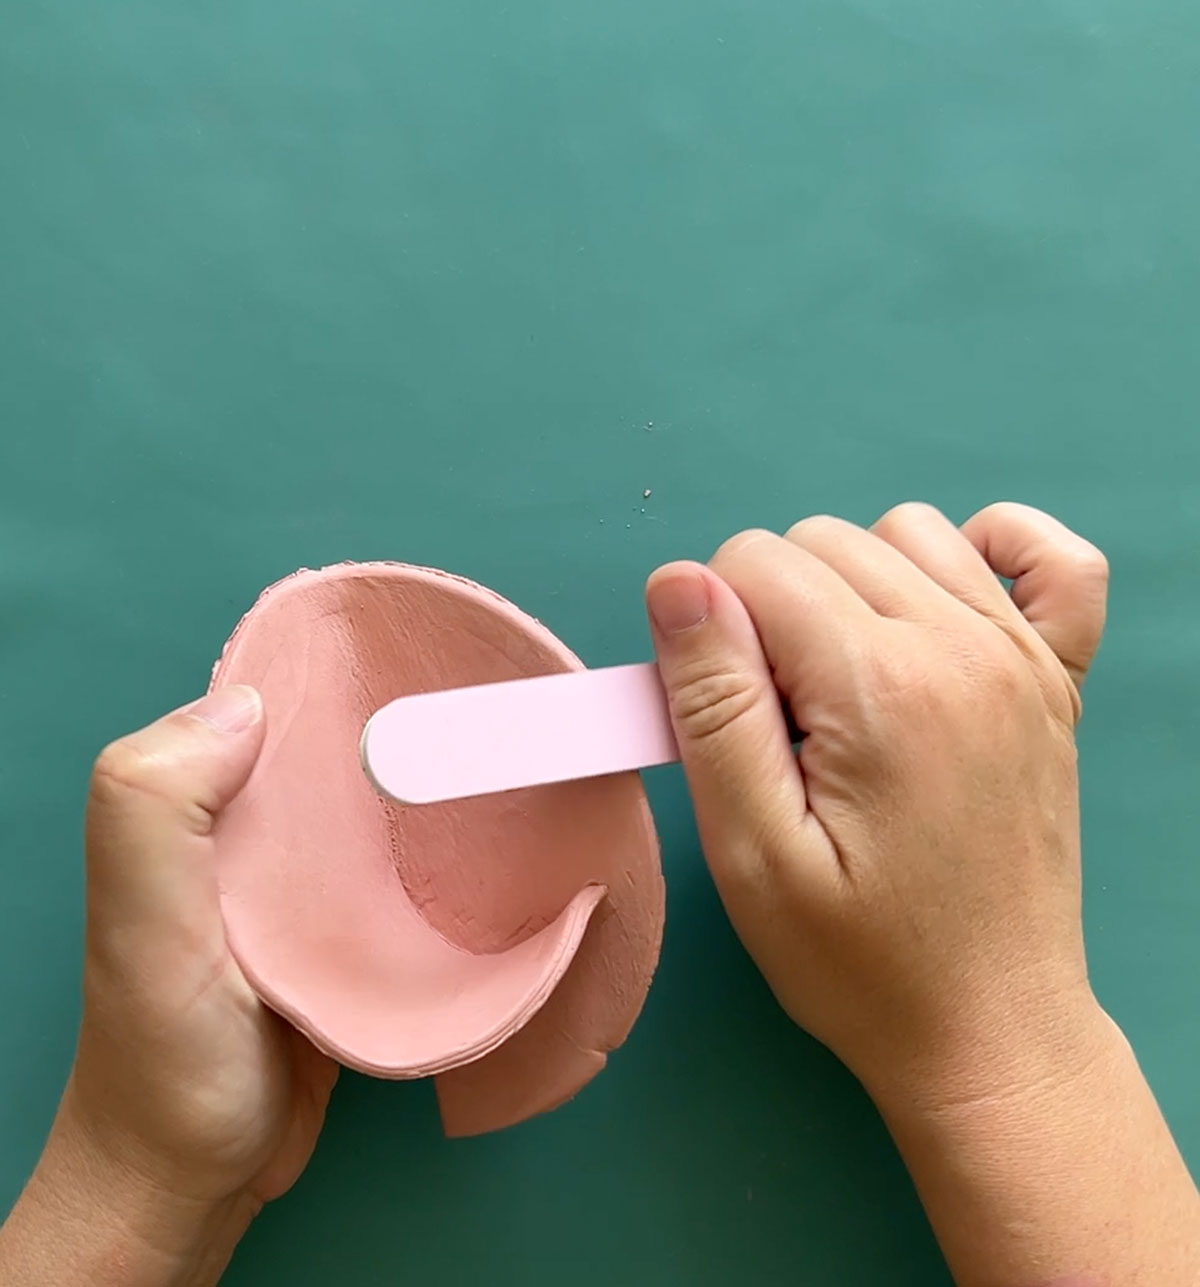
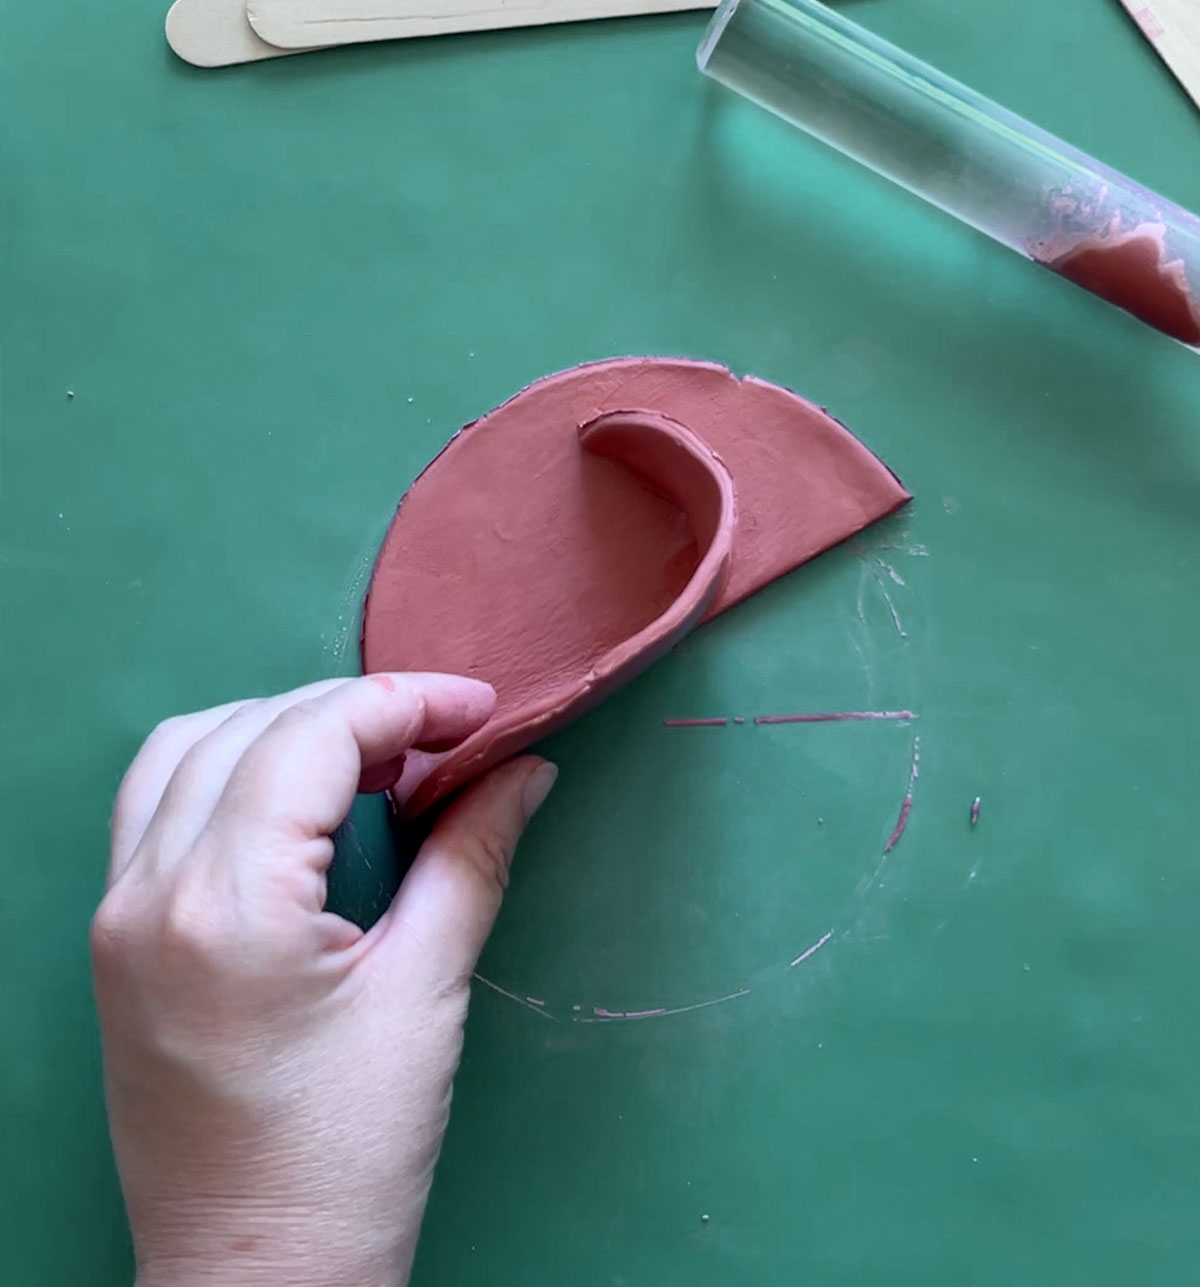
Trinket Bowl
A trinket bowl is incredibly useful as it can help you to keep tiny objects safe instead of placing them on a random spot on a table where they can get lost. Examples of things you can keep in a trinket bowl include:
- Jewelry
- Keys
- Money
- Pens
After making the trinket bowl, you could use acrylic paint to create a pattern or design to suit your home’s decor.
Necklace Pendant
Looking for the perfect gift for a kid, teenager, or friend with an eclectic taste in jewelry? If so, why not make them a unique air-dry clay pendant?
The only thing to remember when making a pendant is to make a hole through it when the clay’s still soft so you can thread a necklace.
You could create a disc-shaped pendant and paint it in the person’s favorite color or include a meaningful logo or picture. Alternatively, you could fashion it into a special object like a heart or dolphin.
Christmas Decorations
Using air-dry clay to make Christmas decorations is a fantastic idea and allows you to add your personal festive style to your home or Christmas tree.
If you’re an air-dry clay newbie, here’s an easy way to make Christmas decorations:
- Remove your air-dry clay from its packaging and roll it out on your work surface.
- Use a rolling pin to flatten the clay and remove any bumps.
- Create your desired decoration shapes using cookie cutters, and create a hole at the top using a toothpick. Just be sure to wash the cookie cutters before using them to make actual cookies.
- After the decorations have dried, give them some color and personal flair with acrylic paint.
- Thread some ribbon through the hole, and hang it on your Christmas tree.
Animal-Themed Toothbrush Holder
Does your kiddo hate brushing their teeth? Perhaps a toothbrush holder shaped like their favorite animal might encourage them?
If you’re keen on making an animal-themed toothbrush holder, mold your air-dry clay into a small vase shape, add the animal’s head on the front and paint it.
Heart-Shaped Tealight Holder
Instead of gifting someone special a boring Valentine’s Day candy or a fluffy toy, make them something special out of air-dry clay.
Making a heart-shaped tealight holder is easy for beginners if you follow these steps:
- Take a 3-inch/7.62cm thick piece of air-dry clay and gently smooth out the lumps with a rolling pin.
- Mold it into a heart shape with a cookie cutter or your hands, and create a hollow in the middle to accommodate a tealight.
- Paint it red or pink, or leave it unpainted for a rustic look.
Colorful Plant Holder
Buying clay plant pots from a garden doesn’t cost much, but they tend to be plain and uninspiring. If you want some interesting-looking pots to house your plants, make one out of air-dry clay.
You can introduce interesting textures to the pot’s walls by gently pressing them with patterned stamps.
You can also make your air dry clay shiny if you know the right technique. Find out what material to use by clicking on the link.
Nursery Mobile
A nursery mobile can keep your little one occupied for ages, but it needs to catch their eye. You can create a bright and interesting nursery mobile for your infant by creating different shapes out of air-dry clay, and painting them in primary colors.
Before allowing the clay pieces to dry, make sure you’ve made a tiny hole through the top for threading the string through.
Cell Phone Holder
Having a special place to rest your cell phone while you’re working or relaxing can help prevent it from getting lost. If you’re looking for a creative birthday or Christmas present for someone, a hand-crafted cell phone holder makes a great choice.
You can mold the cell phone holder into shape, as long as it has a deep indentation for the phone to rest. Some ideas for a cell phone holder include:
- Cactus
- Sunlounger
- Owl
- Sunflower
Refrigerator Magnets
If your kitchen looks a little drab or boring, a cheap and easy way to brighten it up is with colorful refrigerator magnets.
Refrigerator magnets can be any size or shape, and you can get as creative as you like by painting them or adding embellishments. Once they have dried, attach a small magnet to the back with super glue.
Conclusion
Air-dry clay is fun to use for many craft projects. Once you get used to its texture, you can make countless objects with it, and it can bring you many hours of joy.
By following these tips, you’ll find air-dry clay much easier to work with:
- Store it in an airtight container.
- Use a non-stick work surface.
- Gently soften it if it feels too hard.
- Use a rolling pin to make it even.
- Use acrylic paint and white clay for painted objects.
- Remove imperfections before it starts drying.