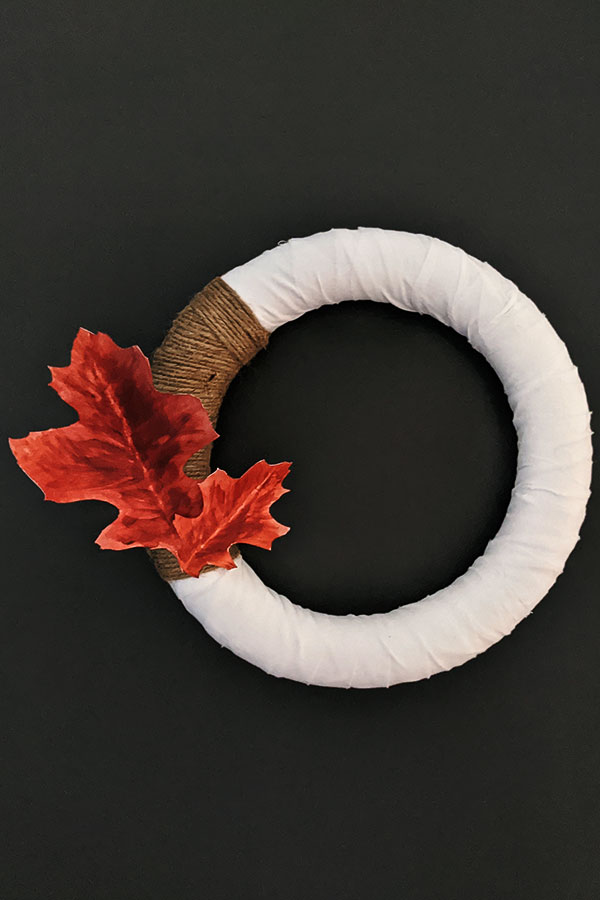


Creating a wreath is so much fun. And if you love dressing up your door during the holidays or any time of the year, this macrame wreath is perfect. This wreath is super simple and can be customized with varying greenery or floral arrangements that fit any occasion.
The hardest part will be starting the knot, but once you get the hang of it, it will be pretty easy moving forward.
Let me show you just how you can make this simple macrame wreath at home.

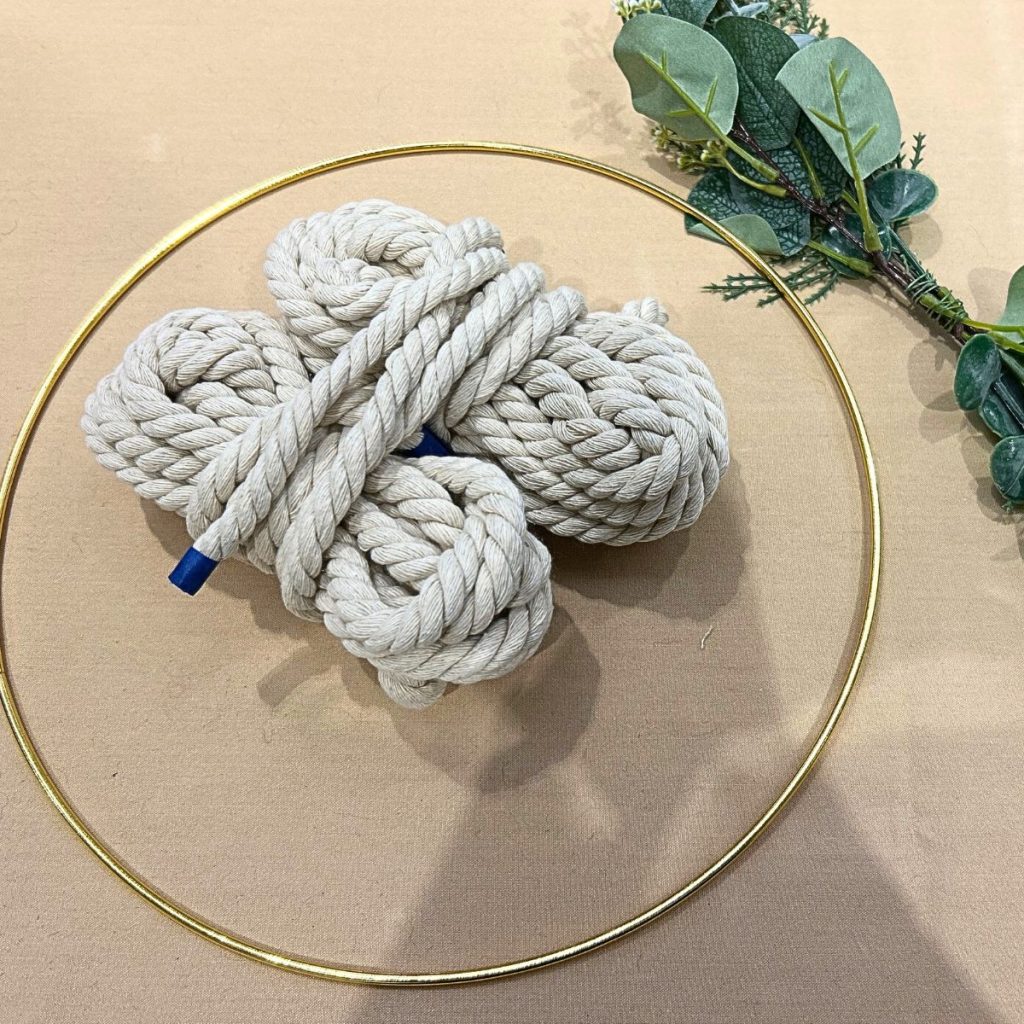
Supplies Needed
- 12″ Metal Ring
- 100% Cotton Macrame Cord (28 ft of 10 mm / 8 mm cord will do)
- Faux Flowers and Greenery
- Blue tape
How to Make a Macrame Wreath
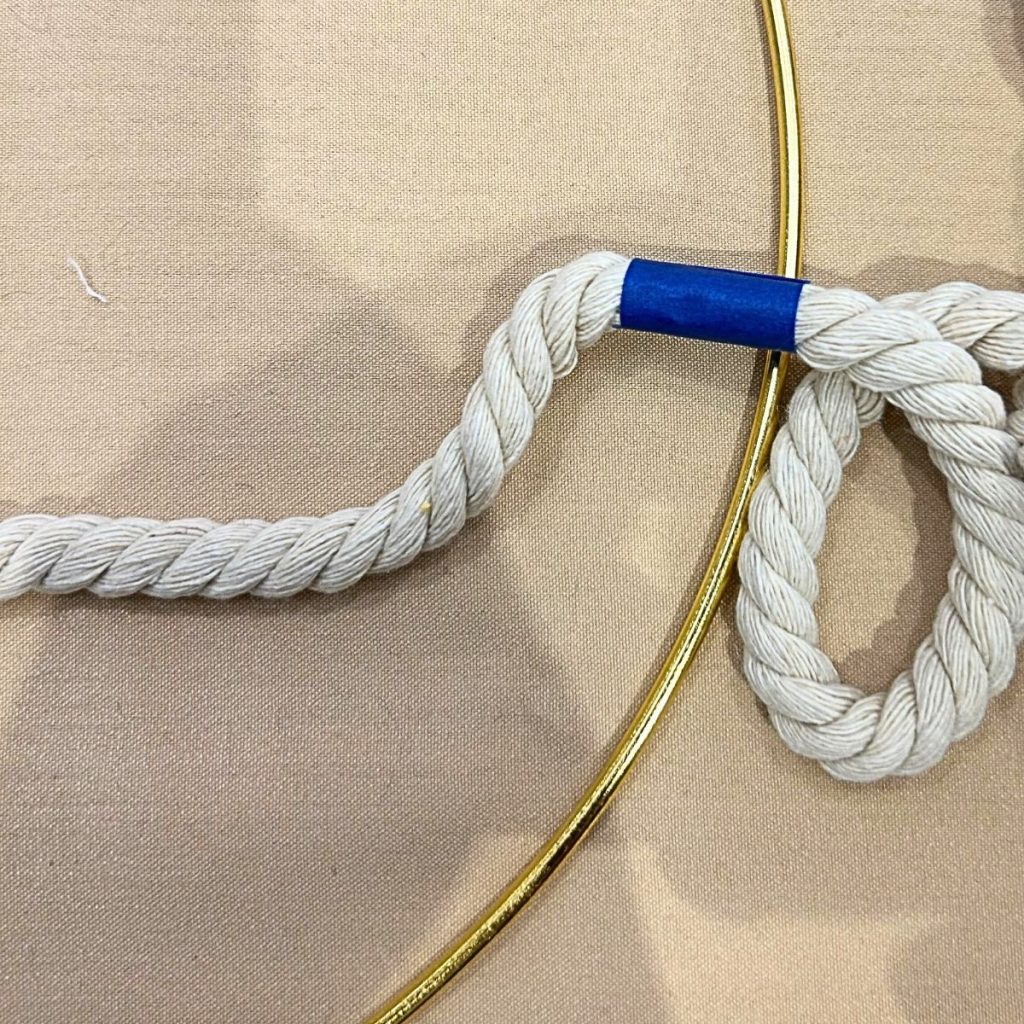
Step 1:
Find the center of the Macrame cord and place a blue tape (or any tape) on it. Attach the center of the Macrame Cord to the Metal Ring.
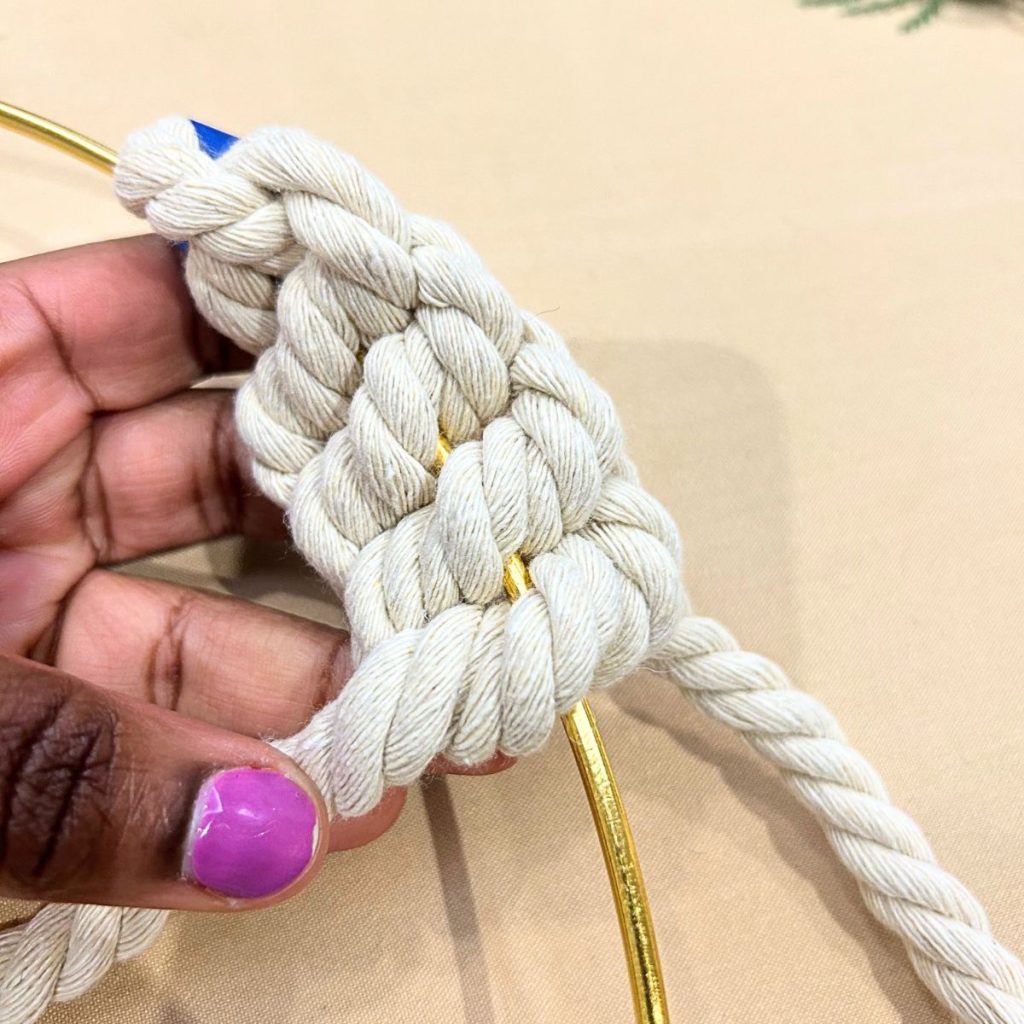
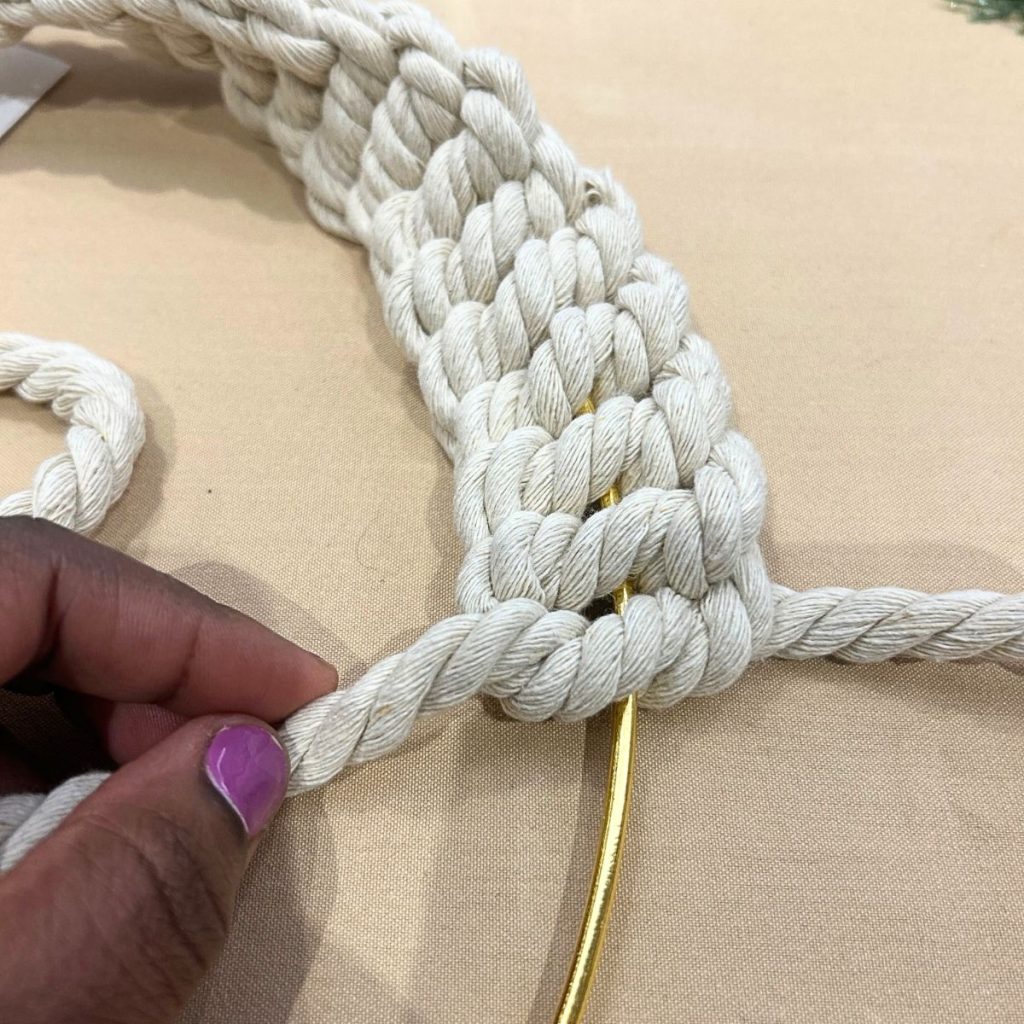
Step 2: Start Your Half Knot
Begin knotting by running a half knot. Start with the cord on the far left, guide it over the ring and under the far right cord, leaving a loop on the left and its tail on the right.
Step 3: Create the Knots
Guide the cord on the right over the tail of the first rope under the ring and through the loop on the left. Then, pull both ends to tighten.

Step 4: Repeat Steps
Repeat steps 2 and 3. The repeated knot will form a spiral column of knots. Continue this knot until the entire ring is encased in the macrame spiral.
Step 5: Close the Loop
Pull the ends of the cord tight on the final knot. Cut the ends of the cord and hot glue the end of the knot to the beginning of the knot, creating a solid ring.

Step 5: Create a Hanger Cord
This part is super simple. Fold a 34-inch piece of the excess cord in half and tie a knot towards the end of the loose area to create the hanger cord.
Lay the Hanger Cord flat, then place the completed wreath halfway along the hanger cord.

Step 6: Add Greenery
Add your desired greenery into the area where the hanger cord and wreath meet.
Note: Depending on the time of year, you can decorate it with certain florals that represent that specific holiday, or season, like Christmas.

Step 7: Bring Everything Together
Once you add your desired greenery, bring the loop around the back of the wreath, then thread your tied cord ends through the loop, pulling them to tighten and hold everything together.

Frequently Asked Questions (FAQ)
How can I customize my wreath for different seasons?
It’s super easy to customize your macrame wreath based on the season. Add spring flowers, summer shells, fall leaves, or holiday greenery and ornaments to your wreath. The macramé base stays the same — swap out your decorations for each season or major holiday.
What size wreath ring should I use?
A 10–12 inch ring is a great medium size for most projects, but you can go smaller for a minimalist look or larger (up to 16 inches) for a statement piece. It’s really up to you and the look you are going for.
How do I hang my macramé wreath?
Use a loop of macramé cord or jute twine tied securely to the top of your wreath, or simply hang it directly from the ring. It looks beautiful on walls and doors.
Can I sell the macramé wreaths I make from this tutorial?
Yes, you can absolutely sell your handmade wreaths. Just make sure to credit the original tutorial or designer as inspiration if required, and add your own creative touches to make each wreath unique.
Which is easier to learn — crochet or macramé?
They’re both beginner-friendly but in different ways. Macramé is easy to start since it uses only your hands and a few basic knots. Crochet involves a bit more technique to handle the hook and yarn, but once you get it, it’s great for making clothes, blankets, and accessories.