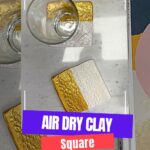


Square ceramic tiles are a popular choice for DIY coasters, but did you know you can achieve a similar look using air-dry clay? This craft is fun and simple, and it lets you personalize each piece to match your style.
And if you’ve been following along, you already know how much we love working with air-dry clay—it’s so versatile! In case you missed it, we’ve made clay feather tags, an incense holder, and a pencil holder.
Whether you prefer soft, earthy tones or a bit of sparkle with gold glitter, these handmade coasters add a unique touch to any space. They also make heartfelt gifts that feel extra special because they’re crafted by hand. In this tutorial, I’ll walk you through the easy steps to create your own air-dry clay square coaster.

Supplies List
- Air-dry clay
- Rolling pin
- Clay Sculpting Tools
- Ruler
- Knife
- Sandpaper
- Acrylic paint
- Paintbrushes
- Mod Podge Gloss Sealer
How to Make DIY Air Dry Clay Coasters
Step 1: Use a Template
Use the Acrylic clay sheet from the Clay Sculpting Tool set.
If you don’t have the Acrylic clay sheet you can create your own square by using a piece of cardboard and a ruler. Use a pencil to draw a 4 x 4-inch square—this will be your guide for shaping the coasters. Once you’re happy with the shape, trace over it with a black marker for better visibility, then cut it out using scissors.
Step 2: Prepare the Clay
Before kneading, air-dry the clay well enough to soften it and remove any air bubbles. Roll it into a ball, then use a rolling pin to flatten it to about ¼ inches thick.
Place your template on top of the clay and carefully cut around it with a knife to create a neat square.

For Clean, Crisp Cuts: Dip your knife in water before cutting the clay. This helps make smoother, more precise edges.
Step 3: Dry and Smooth
Smooth out the edges by using your finger tip. You can also use a ruler to maintain the shape.

Set your clay square on a flat, smooth surface to dry. Make sure to flip it occasionally so it doesn’t warp or curl at the edges. Once it’s fully dry, use fine sandpaper to gently smooth out the edges for a polished look.
Step 3: Roll a Design
Use a patterned roller of choice to add texture and pattern to the air dry clay coaster.


Step 5: Paint and Decorate
Now comes the fun part—decorating! Paint your coaster in any color you like. I painted a third of it gold and the rest white. Make sure to paint around the edges for a modern, elegant touch.

Step 6: Seal for Durability
Apply at least two layers of Mod Podge Gloss Sealer to seal and protect your coaster from moisture and wear. Let each layer dry completely before using your new creation!

Now, you have a stylish and functional set of handmade coasters to enhance your home decor!